Choosing an imaging-compatible operating table is a clinical and engineering decision, not a simple equipment purchase. The right table must support surgeons, anesthesiologists, patients, and imaging staff throughout demanding procedures. It should provide stable positioning, smooth access, and dependable movement around C-arms, CT scanners, or MRI systems.
How to select the best imaging-compatible operating table? Begin with the procedures performed most often in your facility. A radiolucent tabletop can improve image coverage during vascular, orthopedic, and pain-management interventions. However, radiolucency alone does not guarantee efficient imaging. Check the usable imaging area, tabletop thickness, frame design, and clearance for the imaging equipment. Small structural details matter.
Evaluate weight capacity, height range, lateral movement, longitudinal shift, and positioning accuracy. Confirm that the table remains stable when accessories, pressure, and patient weight are combined. Ask manufacturers for compatibility documentation, test results, cleaning instructions, and service support. Experienced clinical teams should also test the table with their actual imaging systems before purchase. A specification sheet cannot reveal every workflow problem.
Safety deserves equal attention. Look for secure patient restraint, reliable brakes, emergency controls, and surfaces that support infection-control procedures. Consider how quickly staff can reposition a patient during a critical moment. That speed matters. No table suits every hospital. Budget limits, room dimensions, staff training, and maintenance quality can change the final decision. Some assumptions may fail in daily use. A careful trial, documented evaluation, and feedback from surgeons and imaging technicians create a more trustworthy choice.
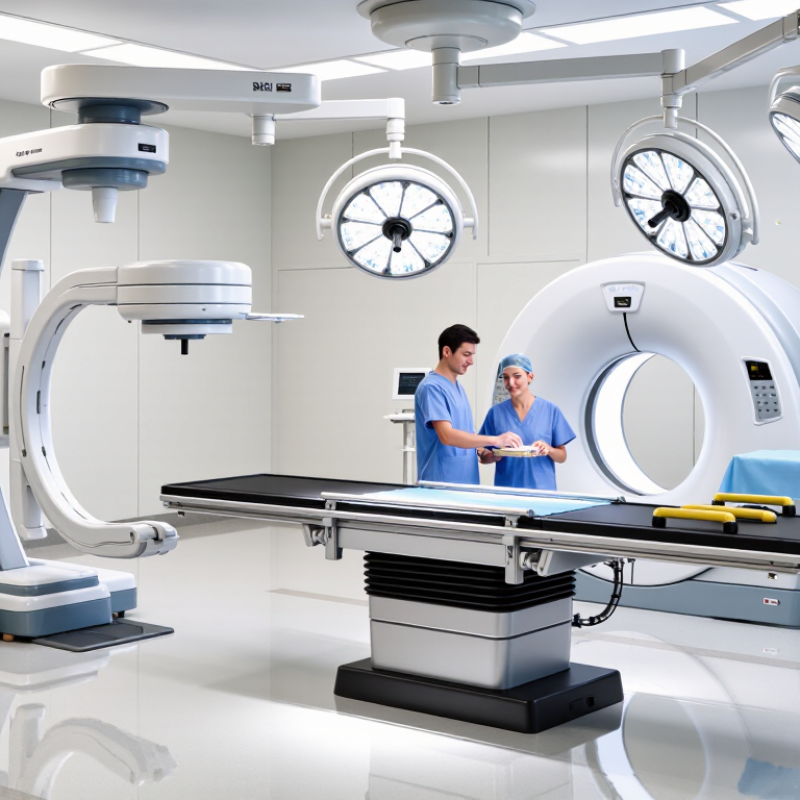
How to Choose the Best Imaging Compatible Operating Table?
Understanding imaging compatibility starts with the table’s construction, not its marketing label. A truly compatible table should allow clear imaging across the surgical field. Its tabletop needs radiolucent materials, minimal metal, and smooth C-arm access. Even small frame components can create shadows or distort anatomy. That matters during delicate procedures.
Check the imaging pathway in real working positions. A table may perform well at its center but block the C-arm when tilted or shifted. Measure the usable imaging area, clearance, height range, and longitudinal travel. Pay attention to cables, side rails, mattresses, and accessories. These details can interfere with equipment movement. Test them together, if possible.
Weight capacity and stability deserve equal attention. The table must remain steady during imaging, transfers, and repositioning. Ask for verified load ratings, compatibility documents, cleaning guidance, and maintenance records. For MRI environments, confirm the exact conditional requirements, including distance limits and approved accessories. “MRI compatible” is not always enough. A confident specification can still hide practical restrictions.
In clinical evaluations, a mock setup often reveals problems quickly. Place the table, imaging device, patient supports, and anesthesia equipment in one room. Watch for collisions and restricted access. I would not rely on a brochure alone. Hands-on testing is slower, but it exposes inconvenient truths before surgery. Even experienced teams may overlook a small obstruction. That is worth reflecting on.
Understanding imaging compatibility means matching the operating table with the imaging modality, access requirements, and safety constraints. The chart summarizes four common compatibility considerations used when evaluating operating tables.
How to read the chart: A value of 1 indicates that the requirement is typically relevant for the imaging modality; 0 indicates that it is not a primary requirement. Radiolucent tabletops support image transmission, longitudinal access supports scanning or image capture along the patient, MR compatibility addresses non-ferromagnetic use, and 360° access is especially important for mobile C-arm procedures.
Choosing an imaging-compatible operating table starts with the procedure, not the product brochure.
Define the imaging pathway, anesthesia access, patient position, and transfer method. A table for CT-guided biopsy may need rapid longitudinal movement and unobstructed gantry clearance. An MRI procedure demands verified MR-conditional components, controlled ferromagnetic risk, and dependable remote positioning.
Weight capacity is only one requirement.
Record the patient’s body habitus, accessories, imaging coil dimensions, and emergency equipment clearance.
That figure makes small transfer details clinically important. Check brake visibility, side-rail operation, mattress seams, and access for airway management. Test them with staff, not only with an empty table.
Radiolucency should be confirmed across the imaging field, including the frame, pads, and attachments.
The American College of Radiology’s Manual on MR Safety emphasizes site-specific screening, controlled access, and equipment labeling. These controls should shape procurement decisions. A narrow tabletop may improve image access but reduce repositioning comfort. A highly mobile design may introduce instability during surgery. The difficult part is admitting that one table rarely fits every workflow.
Create a mock procedure with a technologist, surgeon, anesthetist, and nurse. Measure transfer time, collision points, cable reach, and cleaning effort. Then challenge the findings; a successful demonstration with one patient size may not represent daily practice.
Choosing an imaging-compatible operating table requires more than checking whether its surface appears radiolucent. Materials influence image quality, durability, cleaning, and patient support. Carbon-fiber sections usually provide broad radiolucent windows, while metal frames can create artifacts or block oblique views. However, a table with little metal may feel less rigid during repositioning. That trade-off deserves attention.
Design should match the procedures performed in your operating room. A narrow table can improve C-arm access, but it may reduce comfort for larger patients. Sliding tops, removable cushions, and modular attachments help teams position patients without repeated transfers.
The base should allow sufficient clearance for the image intensifier and cables. Check load ratings in positions your staff actually use, not only in the neutral position. Small details matter. Cushion thickness can change anatomy height and image alignment.
Imaging access must be tested with real equipment. Bring the C-arm and confirm orbital movement across the full scan field. For CT or hybrid rooms, measure table travel, height, and detector clearance. MRI environments require verified material compatibility and careful accessory screening. Cleaning seams, fluid resistance, and maintenance access also affect reliability. A polished demonstration may hide awkward controls or limited access. No table solves every positioning problem. Document cable paths, transfer steps, and image coverage during a hands-on trial.
How to Choose the Best Imaging Compatible Operating Table?
Safety begins with the table’s behavior under pressure. It should remain stable during transfers, imaging, and emergency repositioning. Check load capacity, locking systems, side rails, and accessory attachment points. These features must support real patients, not only laboratory specifications. The World Health Organization reported that surgical complications affected about 7 million patients worldwide each year. Reliable table control can reduce preventable movement and handling risks.
Positioning deserves equal attention. A radiolucent surface should provide a clear imaging path without forcing awkward body alignment. Confirm height adjustment, longitudinal movement, Trendelenburg control, and padding performance. Pressure can build beneath the occiput, sacrum, or heels during lengthy procedures. AORN guidance emphasizes structured positioning assessment and repeated skin checks. Small details matter. Yet, teams sometimes trust memory instead of documenting each patient’s alignment and protection needs.
Table performance should be tested inside the actual workflow. Measure imaging access, transfer time, vibration, cleaning access, and battery endurance. Review data from recognized safety testing, including applicable IEC and ASTM standards. The WHO Surgical Safety Checklist study found major complications fell from 11.0% to 7.0% after checklist implementation, while inpatient deaths declined from 1.5% to 0.8% (New England Journal of Medicine, 2009). A table cannot replace teamwork. I would also question impressive specifications that lack independent verification. A showroom test is not enough. Teams should simulate a difficult transfer, a prolonged scan, and an urgent return to surgery.
How to Choose the Best Imaging Compatible Operating Table?
Evaluating Maintenance, Cost, and Long-Term Value
Choosing an imaging-compatible operating table requires more than checking its radiolucent surface. In daily practice, maintenance details often decide whether a table remains dependable. Inspect wheel locks, hydraulic controls, side rails, and imaging access during demonstrations. Ask how technicians reach seals, cables, and moving joints. Small access panels can reduce service time. Request maintenance schedules, training requirements, and documented load-testing procedures. A supplier should explain these points clearly, not hide them in technical language.
Cost should include installation, staff training, preventive service, replacement parts, and downtime. A lower purchase price may become expensive after repeated positioning faults. Compare warranty coverage carefully, especially for imaging accessories and powered movement systems. Check whether common parts are stocked locally and whether remote support is realistic. A fast response matters when a table stops in a procedure room. Still, projected savings can be misleading. No spreadsheet predicts every repair.
Evaluate long-term value through measurable use, not attractive claims. Review operating cycles, cleaning compatibility, weight capacity, and upgrade options. Speak with biomedical engineers and surgical staff who use comparable equipment. Their experience may reveal awkward controls or difficult cleaning areas. Test the table with a C-arm, a patient simulator, and a full accessory setup. That test may expose limitations. Record service response times and recurring faults after installation.
It should provide broad radiolucent access across the surgical field. Minimal metal helps reduce shadows and image distortion. Clear imaging matters.
Measure the usable imaging area, height range, longitudinal travel, and equipment clearance. Include cables, side rails, cushions, and attachments. Small obstructions matter.
Use the actual C-arm with the table in working positions. Test tilting, shifting, and full orbital movement. A center position may look fine, while an angled view fails.
No. Check stability during imaging, transfers, and repositioning. Test the table with realistic patient weight and accessories. Neutral-position ratings are not enough.
Confirm exact MR-conditional requirements for the table and every accessory. Check material restrictions, distance limits, labeling, and remote positioning. “MRI compatible” alone is too vague.
Carbon-fiber sections can create wide radiolucent windows. Metal frames may block oblique views or produce artifacts. Less metal may reduce rigidity. That trade-off needs testing.
A mock procedure reveals collisions, poor cable reach, awkward transfers, and limited airway access. Include imaging staff, surgeons, anesthetists, and nurses. Empty-table testing is incomplete.
Check tabletop width, cushion thickness, mattress seams, fluid resistance, and cleaning access. A narrow top may improve imaging but reduce comfort. One design rarely fits every workflow.
Not reliably. Test real equipment, patient supports, and emergency devices in one room. A brochure can look convincing, yet miss one stubborn obstruction. Reconsider the result.
How to select the best imaging-compatible operating table? Begin by identifying the clinical procedures, imaging technologies, patient types, and positioning requirements that the table must support. Imaging compatibility depends on more than radiolucent materials; it also includes unobstructed access, a suitable tabletop design, smooth height and angle adjustments, and compatibility with the facility’s existing equipment. Consider whether the table can accommodate different surgical positions while maintaining stability, patient comfort, and accurate imaging throughout the procedure.
Safety and long-term performance are equally important. Evaluate weight capacity, locking systems, positioning accessories, movement control, and emergency adjustment features. The table should be easy to clean and maintain, with durable materials and dependable components that can withstand frequent use. Finally, compare the purchase price with maintenance needs, expected service life, training requirements, and operational efficiency. A well-balanced decision should prioritize clinical functionality, imaging access, staff safety, and lasting value rather than focusing only on initial cost.

Emfix Medical